


Anatomy of the Gear: Setting the Foundation for Kayak Success
Structural Blueprint: Understanding the Anatomy of a Modern Kayak
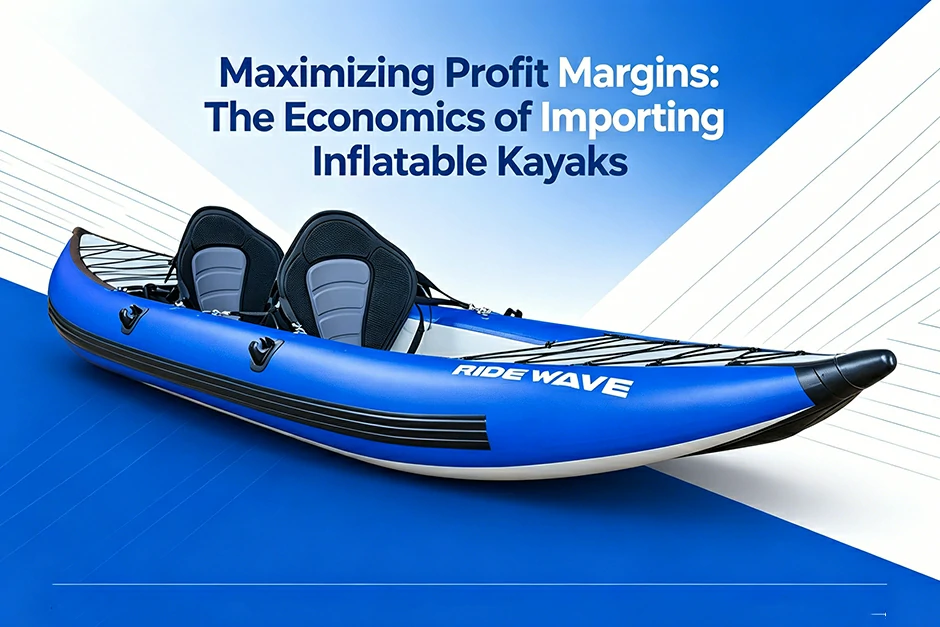
To command your watercraft with absolute confidence, you must first master the structural anatomy of the kayak. Every premium watercraft is divided into distinct zones: the front of the boat is the bow, the rear is the stern, the right side is starboard, and the left side is port. The top deck protects you from waves, while the bottom of the boat, known as the hull, directly dictates how the vessel interacts with the water.
When choosing a boat, beginners must understand the critical difference between primary stability and secondary stability. Primary stability refers to how steady the boat feels when resting on calm, flat water; a wide hull offers high primary stability, making it incredibly comforting for a novice. Secondary stability refers to the boat's ability to remain stable when tilted on its side or when encountering rough, choppy waves. Balancing these structural elements ensures you select a hull shape that matches your paddling environment.
Blade Ergonomics: Mastering Your Kayak Paddle Selection
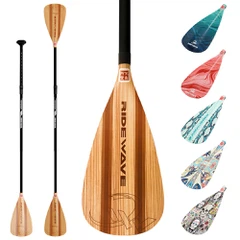
The kayak paddle is your steering wheel and engine combined, making its design paramount to your paddling efficiency. Unlike a canoe paddle, it features blades on both ends of the shaft. Modern blades are typically asymmetrical, meaning they are shaped to slice into the water at an angle, reducing twisting forces in your hands. High-performance blades are also spooned (curved), which traps water to provide maximum leverage during your stroke.
The shaft connecting the blades can be straight or ergonomically bent to reduce wrist strain, and it always features soft rubber drip rings near the ends to prevent water from running down the shaft into your lap. Additionally, beginners should learn about blade feathering. This is when the blades are set at an offset angle rather than being perfectly parallel. Feathering allows the upper blade to cut cleanly through the air instead of acting like a sail, allowing you to conquer harsh headwinds without exhausting your muscles.
Essential Safety Matrix: The Non-Negotiable Kayak PFD and Gear
You should never launch a kayak without equipping yourself with a foundational safety matrix. The single most critical piece of equipment is your Personal Flotation Device (PFD), or life jacket. For paddlers, a specialized Type III PFD is essential; these are designed with large armholes and a high-back foam profile that clears the kayak's seat back, allowing for a completely unhindered range of motion. A properly fitted PFD must feel snug; you should not be able to pull the shoulder straps up past your ears when it is fully buckled.
Beyond your life jacket, your safety kit must include a loud safety whistle clipped to your zipper for emergency communication. For open-water excursions, a bilge pump (a manual hand pump to suck water out of a flooded cockpit), a neon paddle float for self-rescue assistance, and a durable dynamic towline are essential investments that protect your life and your gear when unexpected conditions strike.
On-Land Launch Mechanics and Kayak Body Ergonomics
The Paddle Box Principle: Protecting Your Joints for Kayak Endurance
Before entering the water, a beginner must understand how to hold the paddle to avoid severe shoulder and wrist fatigue. The absolute structural foundation of efficient paddling is the "Paddle Box" principle. To create your paddle box, hold your kayak paddle with both hands centered on the shaft, ensuring your knuckles are aligned with the top edge of the blades. Raise the paddle above your head and bend your elbows at a strict 90-degree angle; this establishes your perfect grip width.
When you bring the paddle down in front of your chest, your arms, chest, and the paddle shaft form a rigid, invisible rectangle-the paddle box. Maintaining this structural shape throughout your strokes ensures that you never hyper-extend your arms across your body centerline. By keeping your hands firmly inside this box, you protect your delicate rotator cuff muscles from strain and mechanically force your torso to handle the workload of moving the kayak.
Core Rotation Power: Driving Your Kayak with Large Muscle Groups
Paddling with your arms is the fastest way to exhaust yourself within the first fifteen minutes of your journey. Your arms are small muscles with limited endurance; conversely, your core torso muscles-your obliques, abdominals, and lower back-are built for sustained power. To properly propel a kayak, your arms should act merely as temporary connecting rods while your upper body rotation drives the blade through the water.
Every time you plant your blade, you should wind your torso up like a spring, rotating from the hips. As you pull the paddle backward, you completely untwist your large core muscles to generate explosive forward momentum. Furthermore, you must engage your legs; as you stroke on the starboard (right) side, you must firmly push your right foot against the internal foot brace of the kayak. This transfers the power generated by your twisting torso directly through the boat's hull, resulting in maximum acceleration with minimal effort.
The Three-Point Contact Seating System: Perfecting Kayak Posture
You do not merely sit on top of a watercraft; you should physically wear it like a fitted piece of apparel. To maintain perfect balance and execute advanced strokes, you must configure the kayak seating system to establish three critical points of body contact. First, adjust the backrest so it pushes your pelvis forward into an active, slightly forward-leaning posture-never slouch backward like you are relaxing in an armchair.
Second, place the balls of your feet firmly on the adjustable foot braces so your knees are bent comfortably upward and outward. Third, compress your outer thighs snugly against the padded under-deck thigh braces of the kayak cockpit (or the side tubes on an inflatable model). This complete three-part locking system ensures that every subtle tilt of your hips instantly rocks the boat's hull, turning your lower body and the watercraft into a single, highly responsive entity on open water.
Shoreline Launch Mechanics: Safe Entry for Every Kayak Environment
The physical transition from dry land to open water is where beginners run the highest risk of accidentally capsizing or scratching their hulls. To perform a safe beach launch, place your kayak perpendicular to the shoreline in parallel shallow water that just barely floats the hull. Step over the cockpit, straddling the boat with one foot on each side in the water. Lower your weight firmly into the center of the seat first, and only then lift your wet feet up and slide them into the interior cockpit.
When launching from a high perpendicular floating dock, position your paddle horizontally behind the seat rim, spanning across to the stable wooden dock to act as an outrigger stabilizer. Keep your weight centered extremely low, grab the dock edge, and slide your feet into the kayak cockpit while keeping your center of gravity completely balanced over the centerline of the boat to prevent an embarrassing, immediate capsize.
The Core Propulsion Strokes: Moving with Maximum Kayak Efficiency
The Forward Stroke: Engineering the Perfect Engine for Kayak Propulsion
The forward stroke is the absolute foundation of your paddling journey, acting as the driving engine of your kayak. A common beginner mistake is pulling the paddle through the water using only arm strength, which leads to rapid exhaustion. To execute an elite forward stroke, you must break the movement down into three highly fluid phases: the Catch, the Power phase, and the Exit.
During the Catch, you wind your torso from the hips, reach forward, and slice the submerged blade cleanly into the water near your toes. In the Power phase, instead of pulling with your arms, you untwist your core torso muscles and firmly push your foot against the foot brace on the stroke side. This mechanical action drives the kayak forward past the stationary blade. Finally, the Exit must occur as the blade reaches your hip. Slicing the paddle out early prevents it from lifting water behind you, which creates unnecessary drag and slows down your momentum.
The Reverse Stroke: Mastering the Brakes and Reverse Gear of Your Kayak
Knowing how to stop immediately and back away from hazards is just as critical as moving forward. The reverse stroke serves as both the brakes and the reverse gear of your kayak. Before initiating this maneuver, you must always look over your shoulder to check your blind spots and ensure the waterway behind you is completely clear of obstacles, rocks, or other paddlers.
To execute the stroke, rotate your torso, reach back, and place the flat, back face of the paddle blade into the water near your hip. Push the blade forward toward your toes, using your core muscles to drive the motion. Keep the blade relatively low and close to the hull to ensure the kayak tracks in a straight backward line. To use this stroke as an emergency brake when moving forward at high speed, perform a series of short, quick, repetitive reverse plants, holding the blade firmly against the passing current until the vessel grinds to a complete halt.
The Sweep Strokes: Engaging the Ultimate Steering Wheel for Kayak Turning
To alter your course efficiently without losing your momentum, you must utilize the forward and reverse sweep strokes. These strokes act as the primary steering wheel of your kayak, allowing you to make wide, sweeping corrections or spin the boat entirely in place without requiring an expensive aftermarket rudder system.
To execute a forward sweep stroke to turn the boat to the left, you plant your paddle blade deep in the water near your toes on the starboard (right) side. Instead of pulling tight along the hull, you carve a massive, dramatic semi-circular arc out into the water, sweeping wide away from the boat until the blade reaches the stern. This maximizes your leverage and swings the bow of the kayak sharply to the port (left) side. Conversely, executing a reverse sweep from stern to bow on the port side will pivot the boat sharply in the opposite direction, giving you total spatial control in tight waterways.
Advanced Maneuvering and Kayak Boat Control Techniques
The Draw Stroke: Moving Laterally for Seamless Kayak Docking
When you need to move your boat sideways-whether to pull up alongside a floating dock or close the gap between you and a fellow paddler-the draw stroke is your primary tool. Performing a sloppy broadside turn in a tight space can lead to collisions, whereas a precise draw stroke slides the kayak completely sideways with zero forward or backward momentum.
To execute a standard T-draw stroke, rotate your chest completely toward your target side. Reach out over the water and plant your active paddle blade parallel to the hull of the kayak, sinking it fully into the water. Using your lower hand as a fulcrum and your upper hand as a driving lever, pull the blade smoothly toward your hip. This physical action draws the boat directly sideways. Just before the blade slaps against the hull, twist the paddle face 90 degrees and slice it cleanly backward through the water to reset for the next stroke without losing your grip or disturbing the watercraft's stability.
The Low Brace: Deploying the Ultimate Anti-Capsize Shield for Kayak Safety
The low brace is your primary line of defense against an accidental capsize when an unexpected wave, a sudden gust of wind, or an erratic current threatens to flip your boat. Instead of panicking and leaning away from the danger (which actually forces the hull to roll over faster), the low brace teaches you to use the flat face of your paddle blade as a stabilizing crutch against the water's surface.
To deploy this anti-capsize shield, hold your paddle low across your lap with your elbows bent upward, keeping the back face of the paddle blade facing down toward the water. If you feel the kayak tilting dangerously to the port (left) side, aggressively slap the back of the left blade flat onto the surface of the water. At the exact same microsecond, perform a rapid "hip snap"-forcefully driving your right knee upward while tilting your pelvis to bring the boat's hull back to a perfectly level position. The instantaneous buoyancy provided by the blade slapping the water gives you the split second of support needed to regain your center of gravity.
Edging vs. Leaning: Altering Your Kayak Waterline for Knife-Edge Turns
To transition from a clumsy beginner to an efficient intermediate paddler, you must understand how to manipulate your hull's interaction with the water through edging. Many beginners confuse edging with leaning, but they are fundamentally different: leaning involves moving your head and center of gravity outside the boat's centerline, which frequently results in a swim. Edging, however, keeps your upper body completely vertical and centered while your lower body cocks the boat onto its side.
When you edge a kayak, you intentionally tilt the hull, lifting one side out of the water and submerging the other. This action completely alters the shape of the boat's underwater profile, creating a shorter, curved waterline. If you edge the boat to the port (left) side while performing a forward sweep stroke on that same side, the curved hull will slice through the water, allowing the kayak to carve an incredibly sharp, aggressive turn to the right. Mastering this lower-body isolating mechanic allows you to weave through tight obstacle courses and twisting river bends with absolute precision.
Environmental Navigation and Water Awareness for Kayak Safety
Reading Flatwater and Coastal Conditions: Managing Wind and Fetch on Your Kayak
When you launch a kayak, you become an active participant in an open ecosystem governed by wind and wave physics. Beginners often underestimate the power of wind, assuming that flatwater environments are always safe. However, wind moving across open water creates a phenomenon known as fetch-the distance over which wind blows without obstruction. The longer the fetch, the larger and more violent the waves will become, even on inland lakes.
To ensure long-term paddling safety, you must monitor the Beaufort Wind Scale. Winds under 5 knots create calm ripples, which are perfect for a beginner kayak excursion. However, once winds reach 11 to 16 knots (Beaufort Force 4), small waves and whitecaps begin to form. For a novice paddler, an offshore wind-a breeze blowing away from the shoreline out into open water-is the ultimate invisible hazard. It can easily push a lightweight boat miles away from safety, making a return paddle against the headwind exhausting or functionally impossible.
The Basics of River Currents: Navigating Eddies and Hazards in Your Kayak
Moving water transforms paddling physics, requiring a completely different set of navigation skills. When a river flows around an obstacle like a boulder, an island, or a sharp bend, it creates a safe zone of reverse current known as an eddy. Eddies are invaluable sanctuaries where you can park your kayak, rest, and plan your route without being swept downstream by the main current.
However, the boundary line separating the downstream current from the stable eddy water is the eddy line, which features turbulent swirling water that can instantly flip an unstable boat if crossed carelessly. Beginners must also learn to scan the water for lethal structural hazards. Chief among these are strainers (fallen trees or tangled branches that allow water to pass through but trap boats and paddlers underwater) and low-head dams. These man-made drops create a continuous, drowning reverse hydraulic cycle that is practically impossible to escape, making portage around them non-negotiable.
Maritime Rules of the Road: Navigating Your Kayak Around Large Vessels
Sharing busy waterways with motorized watercraft requires a strict adherence to maritime laws. Because a kayak is small, sits exceptionally low in the water, and has no motorized propulsion, larger commercial vessels, speedboats, and tugboats often cannot see you. You must never assume you have the right-of-way simply because you are paddling.
According to international maritime rules, smaller, highly maneuverable craft must stay well clear of commercial shipping lanes and narrow channels. Large motorized vessels draw massive amounts of water and cannot stop or turn quickly to avoid a collision. Always cross busy channels perpendicular to the shipping traffic to minimize your time in the danger zone. When encountering a large boat's passing wake (the V-shaped displacement waves left in its path), always turn the bow of your kayak directly into the oncoming waves at a 90-degree angle to slice through them safely, preventing the broadside wave impact that causes instant capsizing.
Self-Rescue, Capsize Recovery, and Risk Management
The Controlled Wet Exit: Overcoming Fear and Executing a Safe Underwater Release
Capsizing is an inevitable part of the learning curve, and mastering the "Wet Exit"-the process of safely slipping out of an overturned boat-is the ultimate way to eliminate anxiety on open water. For beginners using a sit-in kayak equipped with a spray skirt, the fear of being trapped upside down can be overwhelming. However, a controlled wet exit is highly mechanical and requires only a few seconds to execute flawlessly.
If your boat flips, your first instinct must be to remain calm. Tuck your chin firmly against your chest and lean your torso forward toward the deck; this protective posture guards your face and head from striking hidden underwater rocks. Reach forward along the coaming (the rim of the cockpit) to locate the neon grab loop of your spray skirt. Pull the loop upward and forward to unpop the skirt from the rim. Place your hands on the sides of the boat hull near your hips, and smoothly push the kayak away from your lower body as if you are sliding out of a pair of well-fitted jeans. You will instantly float cleanly to the surface thanks to your high-buoyancy Type III PFD.
The T-Rescue Protocol: Deep-Water Partner Recovery and Boat Drainage
When paddling with a companion, the T-Rescue is the fastest, most efficient technique to empty a flooded boat and get a capsized swimmer back into action in deep water without needing to swim all the way to shore. This tandem maneuver relies entirely on leveraging the stability of the rescue boat to clear the water from the compromised watercraft.
Once the swimmer has successfully exited their overturned vessel, they must swim to the bow of the rescue boat to remain safe. The rescuer then paddles up and grabs the bow of the capsized kayak, pulling it perpendicularly across their own deck to form a capital "T" shape. By rocking the flipped boat upside down over their lap, the rescuer uses gravity to drain every gallon of water out of the flooded cockpit. Once the hull is empty, the rescuer flips the boat upright, slides it back into the water parallel to their own hull, and locks their arms tightly over the open cockpit rim. This creates a rock-solid outrigger bridge, allowing the swimmer to easily kick their legs, slide their torso belly-first across the deck, and slip their feet back into the re-stabilized kayak.
The Solo Paddle Float Rescue: Re-entering a Capsized Kayak Alone
If you are paddling completely alone on open water and suffer an unexpected capsize, you cannot rely on a partner to stabilize your boat. In this high-stakes scenario, your neon paddle float (an inflatable bag carried in your safety kit) serves as your artificial rescue partner, transforming your standard paddle into a highly supportive outrigger stabilizer.
To execute this solo recovery, perform your wet exit and flip your capsized kayak right-side up. Take your paddle float, slip it completely over one blade of your paddle, and inflate it fully using the manual blow valve. Next, slide the opposite, uninflated blade horizontally underneath the deck rigging lines directly behind your cockpit seat. This physical setup extends the inflated blade far out over the water, creating a rigid, floating outrigger arm that prevents the boat from flipping over toward that side. Facing the stern, grab the paddle shaft and the cockpit rim simultaneously. Execute a powerful kick with your legs in the water to launch your torso onto the back deck, keeping your weight centered heavily toward the floating outrigger side. Slide your feet back into the cockpit, flip onto your seat, and safely use your bilge pump to remove any remaining water.
Building Consistent Skills for a Lifetime of Kayak Adventures
In conclusion, transforming yourself from an anxious novice into a confident, efficient paddler comes down to mastering foundational mechanics and structural physics. By treating the "Paddle Box" principle as your defensive skeletal shield and driving every stroke through core torso rotation and leg drive rather than raw arm strength, you eliminate the joint strain that cuts many paddling journeys short.
When you pair these refined biomechanics with sharp water awareness-such as reading river eddies, accounting for offshore wind fetch, and mastering safety protocols like the wet exit and T-rescue-you unlock complete spatial freedom on the water. Respect the rules of the water, trust your equipment, and continue practicing these essential techniques. Your kayak will serve as a safe, highly responsive vessel leading you to endless horizons, hidden shorelines, and a lifetime of unforgettable outdoor memories.
Q1: Why does my kayak keep drifting or spinning to one side when I try to paddle straight?
This is the number one complaint of beginner paddlers and is almost always caused by uneven stroke symmetry or improper posture. If your torso is collapsed or you are leaning slightly to one side, you alter the boat's underwater profile, creating uneven water resistance. Additionally, ensure your forward strokes are entering the water at the exact same distance from the hull on both the port and starboard sides. If one arm is reaching further out than the other, you are accidentally executing a slight sweep stroke, causing the bow to pivot continuously.
Q2: What should I do if my kayak gets caught broadside (sideways) against a rushing river current?
Getting pushed sideways against an obstacle or current is a high-risk capsize scenario. Your immediate instinct must be to edge into the current. Tilt your pelvis so the hull edge facing upstream lifts up and over the oncoming water, letting the current slide harmlessly underneath the boat. If you accidentally tilt away from the current, the rushing water will catch the top deck of your kayak, instantly filling the cockpit and flipping you upside down. Deploy a low brace on the downstream side to lock in your stability.
Q3: How do I know if my kayak paddle is upside down or backwards?
Look closely at the face of your paddle blades. High-quality kayak blades are asymmetrical and spooned. The top edge of the blade should be slightly longer and tapered compared to the bottom edge-if the shorter edge is on top, your paddle is upside down. Furthermore, the concave (curved inward like a spoon) side of the blade must face directly toward your chest. This "cup" shape is designed to trap the water and provide maximum leverage; if the back smooth side faces you, you are paddling backward, losing over 50% of your propulsion efficiency.
Related Articles
| Inflatable Kayak Storage & Maintenance Tips For Retail Display |
| Inflatable Kayak Safety Checklist: Tips For Every Paddler |