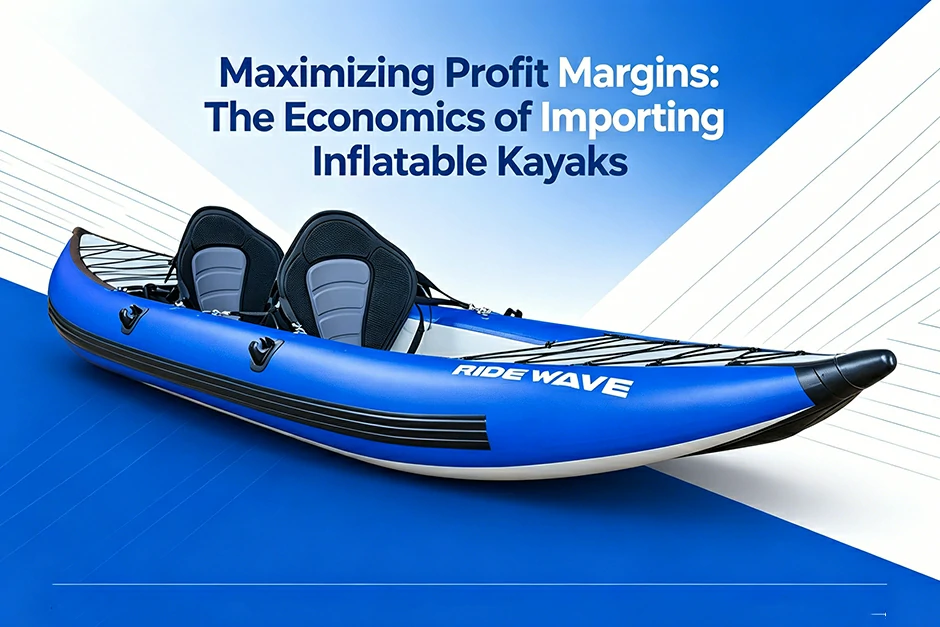

The Inflatable Kayak Revolution: Shifting from Toys to High-Performance Watercraft
Over the past decade, the paddling world has witnessed a massive technological shift. The introduction of heavy-duty PVC coatings, reinforced composite cores, and advanced drop-stitch technology has completely transformed the modern inflatable kayak. No longer categorized as flimsy backyard pool toys, today's premium inflatable kayaks are legitimate, high-performance competitors to traditional rotomolded hardshell boats.
They offer unparalleled portability, effortless storage, and exceptional stability on everything from flatwater lakes to rushing whitewater rivers. However, this massive leap in material engineering comes with a new layer of owner responsibility. Because these watercraft rely on trapped air to maintain their structural integrity, the way you manage that air directly dictates how many years of adventure you will get out of your investment.
The Core Longevity Thesis: What Actually Destroys an Inflatable Kayak?
There is a common misconception among beginners that the ultimate killer of an inflatable kayak is a dramatic puncture from a sharp rock or a hidden river branch. In reality, modern military-grade fabrics are incredibly resilient against external abrasions. Instead, the true silent killers are internal: pressure mismanagement, thermal expansion, and improper moisture control during deflation.
An inflatable boat rarely dies from a dramatic exterior wound; it dies slowly from the inside out. When a kayak is continuously over-pressurized, subjected to intense solar heat without pressure relief, or rolled up wet, its structural bonds degrade. By mastering the simple science of proper inflation and deflation, you can easily extend your boat's active operational lifespan from a disappointing two seasons to over a decade of flawless performance.
What This Guide Delivers: Actionable, Field-Tested Habits for Paddlers
This comprehensive guide is designed to eliminate the guesswork and provide you with concrete, empirical techniques for maintaining your inflatable kayak. We are stripping away the vague generalizations and focusing on the exact mechanics of air valves, material tolerances, and environmental factors.
Whether you are a weekend recreational paddler or an international distributor managing a massive fleet of rental boats, the six core principles detailed below will protect your financial investment, ensure your safety on open water, and guarantee your kayak remains as rigid and responsive as the first day you took it out of the box.
Step-by-Step Inflation Procedures for Kayak Balance
Preparing Your Kayak Setup Area: Eliminating Hidden Hazards
Before you ever unpack your inflatable kayak, your first line of defense in maximizing longevity begins with site selection. Staging and unrolling your boat on an unvetted surface is an easy way to cause microscopic punctures or deep abrasions before you even touch the water.
Always search for a clean, flat staging area. Ideal setup locations include soft grass, sandy beaches free of large debris, or smooth launch docks. If you must set up on a gravel parking lot or a rough riverbank, always lay down a heavy-duty tarp or use your kayak's storage bag as a protective groundsheet. Taking an extra two minutes to sweep away sharp twigs, broken glass, hidden thorns, and jagged gravel ensures that the heavy-duty bottom fabric of your inflatable kayak is never subjected to concentrated pinning stress during the high-pressure inflation phase.
The Kayak Chamber Inflation Sequence Rule: Preventing Structural Distortion
An inflatable kayak is a carefully engineered system of balanced forces. One of the most common mistakes owners make is completely inflating one side chamber to maximum pressure before starting on the others. This uneven distribution of force creates immense lateral stress on the internal bulkheads and baffles.
To guarantee the structural longevity of your inflatable kayak, you must follow the sequential inflation rule. Always inflate multi-chamber boats in stages. Begin by filling the port (left) side chamber to about 30% to 50% capacity until it takes shape, then move to the starboard (right) side chamber and bring it to the same partial pressure. Once the side walls are evenly shaped and balanced, inflate them to their final optimal PSI. Finally, inflate the high-pressure drop-stitch floor or bow/stern air chambers. This staggered approach prevents internal fabric twisting, keeps the central floor perfectly aligned, and ensures the entire hull integrity remains symmetrical over years of heavy use.

Securing the Kayak Valve Pin: Mastering the Halkey-Roberts System
The most frustrating moment for any paddler is disconnecting a pump hose only to hear a loud hiss as all the compressed air rushes right back out. This occurs because the user failed to verify the mechanical position of the valve stem. Most premium inflatable kayaks utilize Halkey-Roberts (HR) valves, which feature a spring-loaded central pin that operates in two modes: open (for deflation) and closed/one-way (for inflation).
Before twisting your pump adapter into the valve, you must inspect this central pin. Press down on the pin and rotate it counter-clockwise; if it pops up and locks into its raised position, the valve is successfully closed. In this one-way state, air can enter from the pump, but the internal spring will instantly slam the seal shut the microsecond air tries to escape. Ensuring the valve is locked in the upright position before you start pumping protects the valve gasket from sudden, violent backpressure shocks and ensures you never lose your perfectly measured PSI.
Managing Thermal Expansion and Sun Exposure for Kayak Longevity
The Physics of Air in a Kayak Hull: Understanding Boyle's and Charles's Laws
To protect your inflatable kayak from structural failure, you must respect the laws of physics governing gases. Air changes its volume and pressure based entirely on its surrounding temperature. When you inflate your watercraft, you are packing millions of air molecules into a sealed PVC or TPU container.
If the ambient temperature rises, these molecules move faster and push harder against the internal walls, dramatically increasing your internal PSI. Conversely, when your inflatable kayak transitions from hot ambient air into cold water, the air inside cools down, contracts, and causes the boat to lose rigidity. Understanding this constant atmospheric flux is essential because what feels like a perfectly inflated, rock-hard kayak on dry land can quickly become over-pressurized or dangerously soft depending on the environment.
The Solar Seam Threat: Preventing Ruptures Caused by Over-Pressurization
Direct sunlight is the single greatest environmental threat to an inflatable kayak's long-term durability. A very common and catastrophic scenario occurs when a paddler pumps their boat to its maximum rated PSI in a cool, shaded parking lot or early in the morning, and then leaves the kayak resting on a hot beach or dock during a midday lunch break.
Within just 30 minutes of direct exposure to intense ultraviolet (UV) rays and rising ambient heat, the internal pressure of a low-pressure PVC chamber can spike by up to 20% to 40%. This massive spike puts immense outward force on the glued or thermal-welded seams. Because manufacturer warranties explicitly exclude damage caused by solar over-inflation, letting your inflatable kayak bake in the sun at maximum pressure will permanently warp the PVC, cause internal threads in the drop-stitch core to snap, or trigger a devastating seam blowout.
The On-Shore Pressure Relief Habit: Protecting Your Kayak During Breaks
To guarantee your watercraft survives years of summer adventures, you must develop the habit of active pressure management. Whenever you pull your inflatable kayak out of the water for an extended break-whether for lunch, a hike, or scouting a rapid-you must minimize its exposure to solar expansion.
The ideal solution is to drag the boat completely into deep shade beneath trees or a canopy. If shade is unavailable, you must manually release a small amount of air from each chamber. Gently press the central valve pin down for a split second to bleed off the excess pressure until the side tubes feel slightly yielding to the touch. When you are ready to launch again, simply hook up your pump for a quick 30-second top-off. This simple, field-tested habit eliminates internal structural stress and preserves the factory integrity of your inflatable kayak's seams for a lifetime of paddling.
Scientific Deflation and Internal Moisture Control
Controlled Deflation Dynamics: Eliminating Structural Pressure Shock
When your journey on the water ends, the method you use to let the air out of your inflatable kayak is just as critical as how you put it in. A very common but damaging practice among paddlers is forcefully slamming the central valve pin straight down into the locked-open position while the boat is at maximum PSI.
This creates a sudden, violent sonic shockwave and a massive drop in internal pressure. This rapid decompression puts severe, instantaneous stress on the internal drop-stitch polyester threads and the multi-layer PVC bulkheads. To protect the inner structural integrity of your inflatable kayak, always practice controlled deflation. Gently depress the valve pin halfway with your finger or a blunt valve tool to let the initial rush of high-pressure air bleed out gradually over 10 to 15 seconds. Once the intense backpressure has subsided, you can safely press the pin all the way down and twist it clockwise into the locked-open position for hands-free deflation.
Utilizing the Pump Deflate Stage: Achieving the Perfect Vacuum
Trying to fold a boat that still has residual air trapped inside its chambers is a primary cause of bad rolling habits. Forcing a partially deflated inflatable kayak into a tight transport bag causes you to bend, drag, and forcefully compress the heavy-duty fabric over hard plastic components like valve rings or skeg boxes.
To achieve a flawless, stress-free pack down, always utilize the "Deflate" port on your 12V electric pump or double-action manual hand pump. Connect your pump hose to the deflation side of the pump housing and screw the adapter securely into the kayak's valve. Run the pump until the air chambers are completely pancake-flat and vacuum-sealed. Drawing every last cubic inch of air out of the inflatable kayak makes the fabric incredibly pliable, allowing it to fold naturally along its factory seams without requiring any structural forcing.
The Moisture Trap Warning: Preventing Hydrolysis and Mold Growth
The single biggest biological and chemical threat to an inflatable kayak during its deflated state is trapped water. Rolling up a boat that is still wet or even slightly damp inside the folds sets off a destructive countdown clock. Dark, compressed, and moist environments are perfect breeding grounds for destructive mold and mildew, which leave permanent stains and deeply unpleasant odors.
More critically, prolonged moisture exposure triggers a chemical reaction known as hydrolysis. Over time, trapped water molecules break down the polyurethane (PU) or PVC coatings that bind the fabric layers together, causing the material to become sticky, brittle, and eventually delaminate. To secure the longevity of your inflatable kayak, never leave it rolled up wet for more than 24 hours. If you must pack it up damp at the riverbank to get home, you must unroll it completely in a well-ventilated space at the earliest opportunity to let it dry thoroughly.
Advanced Cleaning and the "Golden Fold" Technique
Post-Paddle Decontamination: Washing Away Salt, Grime, and Biosecurity Risks
Every time your inflatable kayak contacts the water, it collects a microscopic layer of destructive elements. If you paddle in saltwater, the salt crystals left behind after evaporation act like tiny, abrasive sandpaper shards inside the fabric folds, slowly grinding down the PVC or TPU coatings. In freshwater lakes and rivers, mud, organic grime, and invasive species (such as zebra mussels or microscopic algae) hitch a ride on your hull.
To preserve your inflatable kayak's long-term seam strength, you must perform a thorough post-paddle washdown. Inflate the kayak loosely and spray it down completely with clean, fresh water. Use a soft-bristle brush or a clean microfiber cloth to scrub away stubborn river mud and salt crusts from hidden crevices, particularly the tight track where the floor meets the side tubes. Never use harsh household detergents, bleach, dish soap, or abrasive scrubbers, as these strip the protective UV block built into marine-grade materials.
The Rules of the "Golden Fold": Eliminating Fabric Fatigue and Hard Creases
Repeatedly folding an inflatable kayak in exactly the same way with sharp, pressed creases is a primary cause of localized material failure. When PVC or TPU is forced into a razor-sharp 180-degree bend and packed under pressure, it causes "fabric fatigue." Over time, the internal scrim weakens, and the outer coating develops microscopic stress cracks that eventually become problematic slow leaks.
To master the "Golden Fold" technique, you must treat your inflatable kayak fabric with respect. Instead of stamping down hard on the folds to make the package as small as possible, aim for smooth, radiused, and rolling folds. Follow your manufacturer's designated fold lines, which typically involve folding the side chambers inward toward the center line first to create a uniform rectangle, and then rolling or folding the boat loosely from the bow (front) to the stern (back). By keeping the folds loose and slightly varying the folding placement by an inch or two each time, you distribute the mechanical stress and drastically prolong the hull's operational life.
5.3 Accessory Alignment Strategy: Protecting Your Kayak from Internal Punctures
An inflatable kayak isn't just made of soft fabric; it features several integrated hard plastic and metal accessories that can inadvertently compromise longevity during storage. Components like rigid skeg boxes (fin tracks), heavy-duty D-rings, seat anchorage buckles, and hard plastic valve collars are completely unyielding.
If you roll your kayak carelessly, these hard edges can be pressed directly against a soft layer of PVC under the immense pressure of a tightened cinch strap. During transport, as the bag bounces in your vehicle, those hard points will rub and chafe against the hull fabric, chewing through the material. When execution of the "Golden Fold" occurs, always position these rigid accessories so they lie completely flat against other flat surfaces. If a D-ring or skeg box must press against a soft fabric section, always place a protective piece of foam, a sponge, or a folded towel between them to serve as a puncture-proof shield.
Long-Term Storage and Chemical Defense for Your Kayak
Off-Season Storage Environments: Climate Control vs. The Garage
Where you store your inflatable kayak for the winter or long off-season periods is just as critical as how you use it on the water. Extreme temperature fluctuations, specifically freezing winters or sweltering unventilated garages, can degrade the chemical bonds in the PVC adhesive and embrittle the fabric.
The ideal storage environment is a cool, dry, and climate-controlled space with consistent temperatures between 50°F and 75°F (10°C – 24°C). If you must store your boat in a shed or garage, ensure it is kept off the concrete floor, which can draw moisture and cold directly into the hull. Place your folded, dry kayak on a high shelf or inside a storage bin. Most importantly, ensure the storage area is protected from direct UV light, as sunlight streaming through a garage window will break down the exterior polymers of your inflatable kayak even while it sits in storage.
The Rodent Factor: Why Mice Love PVC and How to Prevent It
It is a little-known but devastating reality that rodents find modern inflatable kayak materials highly attractive. Mice and rats frequently chew through folded boat PVC to harvest the material for nesting or to get through to food odors trapped in the crevices. A single rodent infestation can ruin an entire boat in one night, leaving hundreds of tiny teeth marks that are impossible to repair.
To prevent this, never store your kayak in an area prone to pests, such as an open barn, a cluttered basement, or near pet food. For added security, seal your boat inside a heavy-duty plastic storage container with a locking lid, or wrap it completely in a high-density, rodent-proof storage bag. If you are storing the boat in a garage, consider placing non-toxic rodent deterrents or peppermint-oil-based repellents nearby to ensure your inflatable kayak remains untouched throughout the winter.
Chemical Defense: Your Protection Blacklist
The final step in long-term longevity is chemical maintenance. You should apply a high-quality UV protectant-such as 303 Aerospace Protectant-to your inflatable kayak at the beginning and end of every season. This creates a sacrificial barrier that absorbs UV rays and keeps the PVC pliable and resistant to oxidation.
However, you must maintain a "Blacklist" of chemicals that should never, under any circumstances, touch your boat. Never use:
Acetone or solvents: These will dissolve the PVC adhesive.
WD-40 or petroleum-based oils: These cause the rubberized coating to soften, bubble, and delaminate.
Harsh household cleaners: Bleach and ammonia-based soaps break down the material's chemical stabilizers. By simply sticking to water, mild soap, and approved marine protectants, you ensure your inflatable kayak remains as reliable on its 100th trip as it was on its first.
Building Long-Term Maintenance Habits for Endless Adventures
In conclusion, achieving longevity with your inflatable kayak does not require complex technical skills; it simply requires the discipline of consistent, protective habits. By respecting the strict rules of the Golden PSI Matrix, practicing staggered inflation sequences, and actively managing thermal expansion on hot sunlit beaches, you eliminate the mechanical stresses that cause 90% of all premature boat failures.
When you combine those setup protocols with a dedicated post-paddle freshwater washdown, the "Golden Fold" technique, and a secure, climate-controlled winter storage setup, you transform a temporary watercraft purchase into a decades-long investment. Treat your inflatable kayak with structural respect, and it will safely transport you through countless rivers, lakes, and oceans for a lifetime of paddling memories.
Premium Inflatable Kayak Longevity FAQ
To address the most common lingering concerns of paddlers, here is a quick-reference diagnostic troubleshooting guide regarding inflatable kayak pressure and storage management.
Q1: Can I use a gas station air compressor to inflate my kayak?
Absolutely not. Gas station tire compressors operate at extremely high flow rates and massive pressures (often over 30 to 100 PSI). An inflatable kayak side chamber requires very low pressure (under 3.2 PSI). Because a commercial compressor moves air too quickly, it will blow past your kayak seams and explode the internal chambers before you have time to read the gauge. Only use dedicated manual pumps or specialized marine 12V two-stage electric pumps.
Q2: How firm should the kayak side walls feel if I don't have a pressure gauge?
If your inline gauge breaks in the field, use the "thumb-press test." For standard PVC low-pressure side chambers, inflate until you can still press your thumb into the material with firm pressure and create a small, half-inch indentation. The chamber should feel as firm as a fully ripe watermelon-rigid but slightly yielding. A drop-stitch floor, however, should have absolutely zero yield and feel as solid as a piece of plywood.
Q3: Is it safe to leave my inflatable kayak fully inflated for the entire summer season?
Yes, but only if it is stored out of direct sunlight and checked regularly. If you keep your inflatable kayak inflated on a rack in a cool garage, it is perfectly safe. However, you must expect natural atmospheric pressure changes; you will need to add a few pumps of air on cold mornings and let a small amount of air out if the garage warms up during a summer heatwave.