
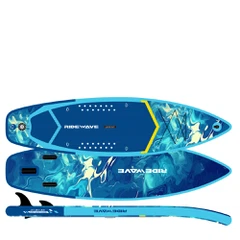

Inflating your paddle board might seem like the most straightforward step before getting on the water. However, doing it correctly is arguably the single most important factor determining your board's performance, stability, and longevity. Under-inflate it, and you'll have a sluggish, unstable board that's difficult to control. Over-inflate it, and you risk damaging the seams or even causing a blowout.
This comprehensive guide will walk you through every detail, from unboxing your new SUP to achieving that perfect, rigid pressure for an optimal day on the water. We'll cover the equipment, the step-by-step process, pro tips, and crucial safety advice.
Why Correct Inflation is Non-Negotiable
Before we dive into the "how," let's understand the "why." Your inflatable stand-up paddleboard (iSUP) is engineered to perform at a specific pressure range, typically measured in PSI (Pounds per Square Inch) or BAR (1 BAR = 14.5 PSI).
- Performance: At the correct pressure (usually 12-18 PSI), the board becomes rigid. This rigidity allows it to glide efficiently through the water, track straight, and respond quickly to your paddle strokes. An under-inflated board will feel soft and flex under your weight, creating drag and making it much harder to paddle.
- Stability: A fully inflated board provides the intended primary and secondary stability. This means it will feel stable both when you're standing still and when it's moving through small waves or chop. A soft board will feel wobbly and unpredictable, especially for beginners.
- Durability: The drop-stitch core inside your board consists of millions of tiny threads connecting the top and bottom layers. At the correct pressure, these threads are taut, distributing your weight evenly across the entire deck. Under-inflation puts excessive stress on the drop-stitch threads near your feet, potentially leading to internal damage over time. Over-inflation, on the other hand, puts immense strain on the seams and the PVC material itself.
The Equipment You'll Need
Your Inflatable Paddle Board (iSUP): Unroll it on a clean, flat surface, away from sharp rocks, sticks, or hot asphalt.
- A High-Quality SUP Pump: This is critical. You have two main types:
- Manual Double-Action Pumps: These are the most common pumps included in SUP packages. "Double-action" means they push air on both the upstroke and downstroke, filling the board much faster. They have two modes:
- High-Volume / Low-Pressure Mode: Use this mode to start. It moves a large amount of air quickly to get the board into its basic shape. The gauge won't be accurate at this stage.
- Low-Volume / High-Pressure Mode: Once the board is firm to the touch (around 5-7 PSI), switch to this mode. It moves less air per stroke but builds pressure much more efficiently to reach the final recommended PSI.
- Electric SUP Pumps: These are a game-changer for convenience. Simply plug them into your car's 12V outlet (or a battery pack), attach the hose to your board, set the desired PSI, and turn it on. The pump will automatically shut off when it reaches the target pressure. They save a significant amount of time and effort, especially if you inflate frequently or have multiple boards.
- A Pressure Gauge: If your manual pump has a built-in gauge, great. If not, or if you suspect it's inaccurate, a separate digital pressure gauge is an inexpensive and valuable tool to ensure precision.
The Step-by-Step Inflation Process
Follow these steps for a safe and effective inflation every time.
Step 1: Preparation is Key
Find a clean, shaded area if possible. Direct, hot sunlight can heat the air inside the board, increasing the pressure beyond your intended PSI and making the inflation process more challenging. Lay the board flat with the valve facing up. Remove the valve cover.
Pro Tip: Before your first inflation, take a moment to understand the valve. Most iSUPs use a Halkey-Roberts (HR) valve or a similar style. To open it for inflation, unscrew the center ring a few turns. You should hear a click, and the pin inside will be depressed, allowing air to flow in. To close it after inflation, screw the ring back down tightly.
Step 2: Connect the Hose
Attach the pump hose securely to the valve. Ensure the connection is tight to prevent air from leaking during pumping. Most hoses have a bayonet-style fitting that locks into place with a simple push and twist.
Step 3: The Initial Inflation (High-Volume Mode)
If using a manual pump, make sure it's set to High-Volume Mode. Begin pumping. At this stage, focus on getting the board into its shape. Don't worry about the pressure gauge yet. Pump until the board is fully formed and firm to the touch but can still be easily pressed with your thumb. This typically takes 3-5 minutes of vigorous pumping and should bring the board to around 5-7 PSI.
Step 4: The Final Push (High-Pressure Mode)
Now, switch your manual pump to High-Pressure Mode. This is where the real work begins. Your strokes will require more effort, but each one will significantly increase the internal pressure. Start keeping an eye on the pressure gauge.
Step 5: Achieving the Perfect PSI
Continue pumping in high-pressure mode until you reach the manufacturer's recommended PSI. This information is usually printed on the board near the valve or in the user manual. A common range is 12 to 18 PSI. When in doubt, aim for 15 PSI as a safe and effective standard.
Crucial Check: The pressure gauge on manual pumps can sometimes be inaccurate due to the effort of pumping. For the most precise reading, pause pumping for a moment and check the gauge when you are not actively applying pressure.
Step 6: Close the Valve and Disconnect
Once you've hit your target PSI, immediately disconnect the hose. Quickly close the valve by screwing the center ring down firmly. This prevents any air from escaping. Replace the valve cover to keep dirt and sand out.
Pro Tips and Common Mistakes to Avoid
- The "Bounce Test" is Not Enough: Many people test inflation by pressing their thumb on the deck. While a firm, springy feel is a good initial indicator, it is not a substitute for a pressure gauge. A board can feel hard at 10 PSI but perform significantly better at 15 PSI.
- Beware of Heat Expansion: If you inflate your board in a cool area and then move it into direct, hot sunlight, the air inside will expand, increasing the pressure. This can lead to over-inflation. If you must inflate in the sun, consider stopping 1-2 PSI short of your target to account for this expansion. Conversely, if your board sits in cold water, the pressure will drop slightly.
- Don't Over-Tighten the Valve: Screwing the valve ring down too tightly can damage the O-ring inside. It should be snug and secure, but you don't need to force it with all your strength.
- Listen for Hisses: After disconnecting the pump, put your ear near the valve. If you hear a slight hiss, the valve may not be fully closed. Give the ring another gentle tighten.
Frequently Asked Questions (FAQ)
Q1: How long does it take to inflate a paddle board?
A: With a manual double-action pump, it typically takes between 5-10 minutes for an average adult paddle board. An electric pump can cut this time down to 3-5 minutes, doing all the work for you.
Q2: Can I use a regular air compressor?
A: It is possible, but extreme caution is required. Most air compressors deliver air with immense force and can easily over-inflate and rupture your board in seconds. If you use one, you must:
- Use a pressure regulator.
- Attach a reliable pressure gauge.
- Inflate in very short bursts, checking the pressure constantly.
- It is generally safer and recommended to use a dedicated SUP pump.
Q3: My board loses pressure while I'm on the water. Why?
A: A very slight pressure drop over several hours is normal due to temperature changes. However, a noticeable drop in a short time indicates a leak. Check the valve is closed tightly first. If the problem persists, you may need to perform a leak detection test (using soapy water on the board surface and valve to look for bubbles).
Q4: What is the absolute maximum PSI for my board?
A: Never exceed the maximum PSI rating provided by the manufacturer, which is usually around 18-20 PSI for recreational boards. Inflating beyond this limit drastically increases the risk of seam failure or a blowout.
Conclusion: Precision Equals Performance
Taking the extra few minutes to inflate your paddle board to its precise recommended pressure is the simplest way to guarantee a fantastic day on the water. It transforms your iSUP from a soft, cumbersome raft into a rigid, high-performance watercraft. By using the right pump, trusting a pressure gauge over the "thumb test," and understanding how temperature affects pressure, you'll ensure your board performs as designed and lasts for many adventures to come. Now, go pump it up and get out there